Saturday, 24 March 2018

How to make slime.Easy DIY.

How to Make Slime with Elmer’s Glue

Materials:
  • 2 Bottles of Elmer’s glue (5-6 oz each bottle)– Clear, Glitter Glue, or White Glue
  • ½ – 1 tsp of Borax
  • 1 cup hot water, ½ cup water
  • Big, wide bowl
  • Liquid watercolor or food coloring (optional)
  • Glitter (optional)
  • Confetti (optional)
  • Vinegar
  • Gloves
Need the perfect slime recipe. This slime recipe with borax is so inviting and calming. It is an inviting play recipe that will keep children busy for hours!
I recommend using two bottles because you want to get a perfect consistency of slime, and the second bottle is a backup. Make them one at a time though so that you can adapt the second one if necessary. Getting the perfect consistency the first time doesn’t always go so smoothly, so I like having the second bottle to make my slime completely perfect!
My favorite slime is made of clear glue or glitter glue (both Elmer’s). But Elmer’s white glue works as well. You are able to see through the clear glue or glitter glue, but white glue looks more like the substance many of us remember as silly putty.
Borax is available online, but it is much more affordable in the grocery stores. You will find it where cleaning detergents are located.

Bowl 1 – Water and Borax Mixture
Find a nice sized bowl. You will need to squish the slime in it, so make sure it is big and wide enough.
Mix one cup of hot water in the bowl with ½ tsp of borax. Dissolve completely.
You will want to hold onto this mixture, even after your slime is made! If you find that your slime is too stretchy or turns sticky after a few minutes of playing, you’ll be glad you didn’t dump this out!
Allow the borax and water to cool as you prep you the next step.
Bowl 2 – Glue and Water Mixture
Mix one container of Elmer’s glue (5-6 oz) with ½ cup of water. You won’t want to skip this step. The glue needs to be watered down and separated to prevent a slime fail. I find that a container with a pour spout is perfect for this.
Use a whisk to stir them together. You want it to be completely mixed, so this may take a few minutes.
Add a squirt of liquid watercolor or a few drops of food coloring. This is also when you want to stir in any glitter. Fine glitter will show up really small and make your slime glisten. Big glitter will add a pop of color and fun. Here is a gorgeous gold glitter slimefrom Fun at Home with Kids with the large glitter.

Need the perfect slime recipe. This slime recipe with borax is so inviting and calming. It is an inviting play recipe that will keep children busy for hours!
If you use Elmer’s glitter glue, which is already colored, you don’t have to use coloring or glitter. But you can add extra if you want more.

Combine the two!

Need the perfect slime recipe. This slime recipe with borax is so inviting and calming. It is an inviting play recipe that will keep children busy for hours!
Now it’s time to pour your glue mixture into the big bowl with the borax and water mixture.
Watch for a minute as the glue mixture starts to polymerize! It’s such a cool sight to see.
Then, start squishing the slime to help it absorb as much of the borax and water mixture as possible. Feel free to wear gloves or to stir with a spoon if you would prefer. I recommend that the adult does this part.
The slime will feel quite sticky or chunky for a minute or two but keep squishing, kneading, stirring, or mixing. Do this for two to three minutes.
Once it isn’t feeling sticky or chunky, pull it out and knead it some more.
Hopefully, you will have an amazing slime that is perfect to stretch, bend, and mold. Lastly, add any confetti to your slime. Here is our slime with a touch of snowflake confetti.

Need the perfect slime recipe. This slime recipe with borax is so inviting and calming. It is an inviting play recipe that will keep children busy for hours!
You can even jazz up your slime with some snowflakes or other confetti, plastic creatures, cookie cutters, or anything other fun play items. I avoid putting anything wood into slime, but there are so many other toys or craft materials you could use!
Getting the right texture
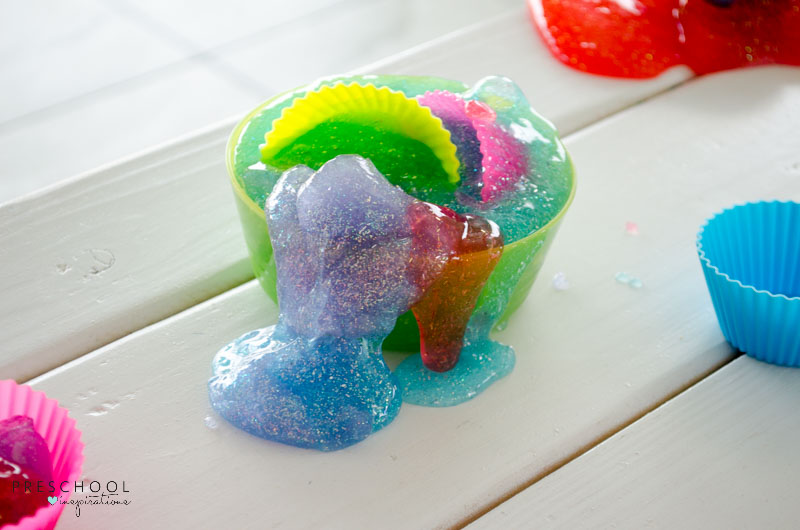
Need the perfect slime recipe. This slime recipe with borax is so inviting and calming. It is an inviting play recipe that will keep children busy for hours!
I like my slime to have a nice amount of stretch without being sticky or rubbery. Finding that perfect amount takes a little bit of practice. If you love how your slime turned out, then just repeat this recipe for the second bottle of glue.

Slime that is too sticky

If your slime is feeling too sticky, put it back into the bowl and squish it into the water some more. If this doesn’t help, add another ¼ tsp of borax to the water mixture and then try putting the slime back into the mixture again.

Slime that is too stretchy

If your slime is too stretchy, add ¼ tsp of borax to the water and stir until it dissolves. Now put the slime back into the borax and water and squish again.

Slime that is too rubbery
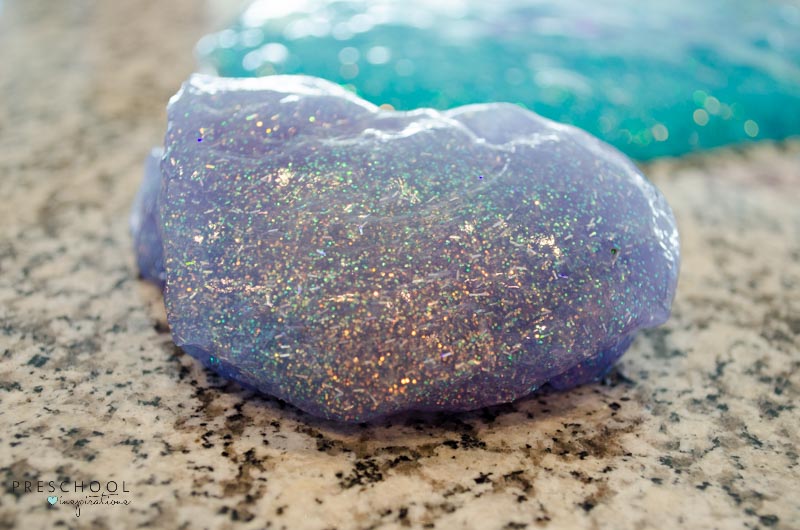
Need the perfect slime recipe. This slime recipe with borax is so inviting and calming. It is an inviting play recipe that will keep children busy for hours!
Here is super rubbery slime!
Sometimes this will fix itself after it has been played with for several minutes and gets warmed up.
If it’s still too rubbery after being warmed up, then you will make another batch of slime that is super stretchy. Then combine the two slimes, and they melt together to make a great consistency. Pictured below is a super stretchy slime with a rubbery one on top of it. When they combined, it was perfect consistency!
Once they blend together, knead them for a minute or two, and your slime will feel so much better!
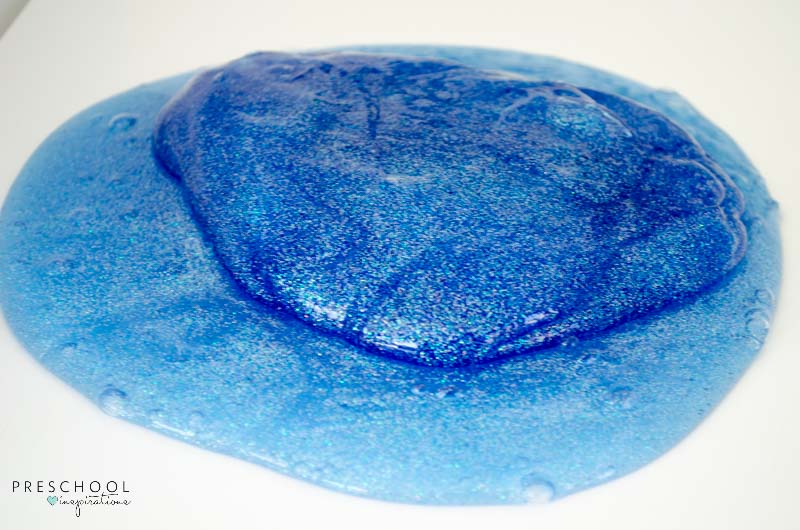
Need the perfect slime recipe. This slime recipe with borax is so inviting and calming. It is an inviting play recipe that will keep children busy for hours!
The way to make a super stretchy slime is to use only ¼ tsp of borax when you make the water and borax mixture.
That’s where the second glue bottle comes in handy!

Remove Slime from Hair or Clothes

Once you get playing with the slime, you will need vinegar if any gets on clothes or hair. The vinegar will dissolve it right away!

Storing Slime

Store your slime in a bag or airtight container. We use our slime for weeks, but just keep an eye on it. If you accidentally leave your slime out for a few hours, it should recover. Just put it in a bag and bring it out in a day.
I hope this slime recipe helps you make slime that is perfect the first time!

Wednesday, 21 March 2018

Electric Longboard

Hi everyone!
This will teach you the easiest way to build an electric longboard with 3D Printed part.
The longboard has a Top Speed of about 34 Kph and a battery life of 30 kilometers (18,6 miles) per charge.
Let me explain first why this is the simplest Electric longboard you can build :
So this DIY electric longboard will be the simplest one because I'll be giving you guys all the parts I used in detail and also all the 3D files required so you don't have to worry about creating your own motor mounts or calculate which belt/pulley to use :)
Moreover, the motor mount has a bolt on design! which mean you don't have to worry about glue or epoxy not sticking on or creating a metal motor mount that needs welding.
Parts required :
- A longboard/cruiser/skatebaord deck (pick the one you prefer)
- 2 x Caliber 184mm Trucks (I used the 50° ones)
- 1x High voltage ESC that is 100Amps min, I used : HobbyKing 100A ESC 4A UBEC ($40) but any other will work, a car ESC would be the best
- A RC Car remote, any will do, I used : Quanum 2.4Ghz 3ch Pistol Grip Tx & Rx System ($20)
- 1x HTD 5M 12T Pulley (6mm bore and 16mm width or so) - local hardware store or ebay ($4)
- 1x HTD 5M 255mm Belt with a 9mm with (also called 255 -5 M-9 belt) - local hardware store or ebay ($5)
- 5x 4mm x 60mm countersunk head screws with nuts
- 1x 5mm x 40mm screw with nut
- 1x Female XT90 connector (if your ESC has none)
- Your standard skateboard hardware & bearings
- Optional but highly recommended: a Lipo low voltage alarm 
Tools needed :
- A regular skateboard T-tool or some screwdrivers + wrenches
- 3D Printer or 3Dhubs account
- A soldering iron
- Some double sided tape or glue
- Some red threadlocker
Building time : it can be assembled in one hour if you have all the parts ready including the 3D printed parts :)
Difficulty : easy to moderate, you just need some basic soldering skills

Step 1: Gather All the Parts

Picture of Gather All the Parts
This step is pretty straightforward, gather all the parts listed above, note that you can choose different items from the ones I've used, many other will work, but I highly recommend to go for the same trucks and motor as the motor mount is designed for those. Same with the wheels, don't choose other wheels because the Orangatang Kegel have holes allowing us to mount the 3D Printed wheel pulley.
You can choose any ESC though, as long as it is 6S and 100A min, any 6S battery will work too but I find that the one I use is a great compromise between power and capacity :)
Here are few recommendations regarding the skateboard components:
Deck
The Deck is the most important part of your skateboard, so for this one, just choose your favorite style of deck or the one you'd like to transform into an electric skateboard. It can be a longboard, a cruiser, a skateboard... is doesn't really matter. Just keep in mind that you have to mount a pretty big battery underneath so don't choose a tiny board ;)
I made the deck I've used myself from plywood, using multiple layers of thin plywood, some glue and a press. This way I was able to recreate the shape of my favorite cruiser board that got crushed when I got hit by a car once.
Bearings
For your bearings, I highly recommend to use some great and well lubricated bearings, especially on the motor wheel as a lot of tension will go on there. You can get some cheap Minilogo bearings for $10 the set of 8, those bearing have the best price/quality ratio you can find IMO and I've used them in many of my skateboards.

Step 2: 3D Print All the Parts

Picture of 3D Print All the Parts
Now that you have all the required parts, you can print the 3D designed ones :)
All the parts I made were designed in Autodesk 123D Design!
There are two type of 3D printed parts :
- The crucial moving parts : the wheel pulley and motor mount
- The classic parts : the battery box and ESC holder
For the "crucial parts", I highly suggest you to print them in PETG or ABS, or another strong material like Nylon, in order to have some really strong parts. Infill must be high to, something between 70% and 100%. Those parts are the most important ones and will go through a lot of tension so you need to have them as strong as possible.
Mines are printed in PETG which is just fine :)
For the less important parts, like the battery box, PLA is fine, and you can go with a lower infill too. I suggest you to keep at least a 40% infill on the battery box though as the battery weight 1kg. Those parts are not mandatory, you can find other ways to mount your battery underneath your deck.
If you have a 3D printer then you can start printing them now ;)
Otherwise, you can also order those part to be printed in 3D Hubs.
Here are all the STL Files I designed : the motor mount, battery box and ESC holder.

Step 3: Install Everything on Your Deck

Picture of Install Everything on Your Deck
3 More Images
This part is where things get exciting!
It is time to assemble the Electric longboard and it is actually pretty simple! Here are the main steps to follow:
Solder the XT90 connector to the positive & negative wires of your ESC, this will allow you to directly connect your ESC to your battery.
Mount the motor on the motor mount, this is very easy, just take the 4 motor screws and mount it onto the inner side of the motor mount (the opposite side of the "flat side" of the motor mount)
Mount the wheel pulley on the wheel, simply take the 5 4mm x 60mm screws and nuts and mount the pulley to the Orangatang Kegel wheel
Mount the motor mount to the truck, the motor mount should be on the inner side of your deck, to secure the motor mount on the truck, simple use the 5mm x 40mm screw and nut, no glue required!! :)
Mount the Motor pulley (the 12T pulley) to the motor shaft, secure the small screws tightening the pulley to the shaft with some red threadlocker, this is very important!
Place the belt on the truck & motor pulley and mount the wheel onto the truck, wrap the belt around the wheel by turning the wheel, you should get the belt on both pulley pretty easily. You can now adjust the position of the motor mount on the truck in order to get a perfect clearance (not to big, not to small) between the wheel pulley and the motor mount.
Stick your ESC & radio recever to the bottom of your deck
Stick, glue, or bolt the battery case to the bottom of your deck and place the battery inside. You can then secure the battery in place using a velcro scratch.
And finally, plug the signal wire from the ESC to the Ch.2 of your radio receiver
You're almost good to go! All you need to do now is connect the 3 ESC cables to your motor, you can connect them in any order. Swapping 2 cables of the 3 connecting cables will actually change the rotation direction of the motor, so if your motor is spinning in the wrong direction, just swap 2 cables around :)
Your Electric Longboard is now ready to use!
You can add some little extra if you want like a small case for the ESC to protect it and make it look better or a switch between the ESC and the battery (that can be connected with 2 XT90 plug). The switch is very convenient, however make sure to find a high quality, high amps switch, I made one once from a cheap quality switch and it switched of while riding and I almost fell really badly.

Step 4: Have Fun Riding It!

Picture of Have Fun Riding It!
As always, here comes one of the best: the test!
You can now have fun riding your electric longboard!
As mentioned in the intro, the longboard has a top speed of about 34 KPH, and a battery life of 30 kilometers, which is enough for a lot of fun. You can even buy 2 batteries and keep one as a spare in your backpack for an amazing ride time.
The longboard will climb small hills easily too! I weight 75 kilograms and don't have any issue riding up small hills that are not very steep.
If you use the exact same ESC and radio controller, here is how the longboard is operated:
In order to go to a full motor stop, pull the trigger to its bottom position, then gently release it to start going forward and gain speed. Once you reach the "neutral position" of the trigger, you are now in cruising mode ! which means that you can now enjoy your ride without having to worry about your throttle! the longboard will keep its cruising speed by itself. Then if you want to go faster, just push the trigger to its upper position, which is the top speed.
I like this set up because of the cruising mode, allowing me to cruise around with having to keep a finger on the throttle :) It can be modified by programming the ESC too.
For charging the battery, you can use a Lipo balance charger that support 6S lipos, and a XT90 charge lead. A great and cheap charger is the Imax B6AC.
Warning : the longboard can reach pretty fast speeds so make sure to wear some protective gear (at least a helmet) as it can be very dangerous, especially if you are not an experienced skateboarder.
Thanks a lot for reading my blog, I hope that you'll have fun making and riding this Electric Longboard :)

Easy Truck From DC Motor DIY.


Step 1: Tools You Need to Make This Awesome Truck

Picture of Tools You Need to Make This Awesome Truck
  1. Plastic Bottle
  2. DC Motor
  3. Battery
  4. Plastic Pinium
  5. plastic bottle caps
  6. glue gan
  7. box
  8. pop sticks or ice cream sticks
  9. Soldering iron
  10. Straw
Step 2: Make a Hole With Bottle Caps
Picture of Make a Hole With Bottle Caps
Now Make a hole with bottle caps with Soldering iron in the middle of the caps.

Step 3: Take Straw and 2 Bottle Caps

Picture of Take Straw and 2 Bottle Caps
Now Take Straw and 2 bottle caps to make the wheel.

Step 4: Make a Wheel

Picture of Make a Wheel
Make a wheel using bottle caps and straw as like the picture.

Step 5: Attach the Wheel With Battery

Picture of Attach the Wheel With Battery
In this stage attach the wheel with Battery.

Step 6: Make Another Wheel With Pinium

Picture of Make Another Wheel With Pinium
Now Make another wheel with plastic pinium, see the picture.

Step 7: Add Glue in Battery

Picture of Add Glue in Battery
Now add some glue with battery

Step 8: Attach Dc Motor With Battery

Picture of Attach Dc Motor With Battery
Now Attach Dc Motor with battery using glue and must set both pinium with as like wheel and DC Motor. See the picture.

Step 9: Add Straw With Wheel

Picture of Add Straw With Wheel
First cut the straw in the middle and add it with wheel as like picture.

Step 10: Give Some Glue in the DC Motor

Picture of Give Some Glue in the DC Motor
Give some glue in the DC motor to add another wheel which has pinium.

Step 11: Make Two Wheel

Picture of Make Two Wheel
Now Make two wheel with plastic bottle caps. as like picture.

Step 12: Add a Pop Sticks

Picture of Add a Pop Sticks
Now add a pop sticks in the back wheel of the truck which have a pinium.

Step 13: Add Two Wheel With Pop Sticks

Picture of Add Two Wheel With Pop Sticks
Now Add two wheel with pop sticks with glue,
Step 14: Add a Box With the Two Wheel
Picture of Add a Box With the Two Wheel
Now add a box with two wheel where you put a pop sticks last steps.

Step 15: Now Add Box Wheel With Dc Motor Pop Stick Section

Picture of Now Add Box Wheel With Dc Motor Pop Stick Section
Now add box wheel which you made last steps with Dc Motor Pop stick section. and use some glue to add them.

Step 16: Now Your Truck Is Ready to Run

Picture of Now Your Truck Is Ready to Run
Now connect with motor and battery and run you trucks. Its ready to use now and enjoy it.

If you confuse any steps watch my full video here:

Make Ice Cream Maker At Home DIY


Ice cream machine
This Drill machine life hack is awesome idea to make mini ice cream machine.
Use Unusable Plastic container and aluminium container to make this type of machine.
Lets make Ice Cream making Machine which make ice cream in 10-20 minutes.
For making this machine you need Drill machine , Plastic container , Aluminum container and Nut-Bolt.
Step 1: Take Material As Per Capacity
If you want better ice cream machine performance then make small machine.
Size of all material is depending on your capacity of making ice cream.
I take 18 cm Diameter and 22 cm height Plastic Container & 12 cm Diameter and 16 cm height Aluminium Container.
I also use 25 cm long and 1 cm diameter bolt and 4 numbers of Nut and 2 Numbers of Washer.

Step 2: Aluminium Pipe

Take 10 cm long Aluminium Pipe to cover Bolt for make corrosion free.
Pass this Aluminium Pipe from bolt and fit one nut through it.


Step 3: Make Wings of Shaft.
For making wings of shaft take two 13 X 6.5 cm Aluminium Sheet.

Step 4: Paste This Wings on Shaft

Picture of Paste This Wings on Shaft
2 More Images
Take Hard glue for binds them together.
Paste glue on wings and binds as per Picture.

Step 5: Drill the Hole.

Take Drill Machine and fit 10 mm tool for drilling hole.
Then start machine and drill hole at the middle of aluminium container lid.

Step 6: Connect Lid to Bolt.

Then Connect all Bolt , Washer and Lid as per Picture.

 Step 7: Bend Wings.

Then Bend this two wings anti-clock-wise at 30 degree.

Step 8: Take Bearing

ake one bearing size of 4 cm outer diameter and 2 cm inner diameter.
Mark sign to bottom of aluminium container at middle.

Step 9: Make M Seal Paste

Take one m seal and make paste for stick bearing to container.

Step 10: Stick Bearing.

ake Bearing at middle of aluminium container and stick with m seal.

Step 11: Take Plastic Button.

Take Plastic button as inner diameter of bearing.

Step 12: Stick With Plastic Container

Paste glue on plastic button and stick at bottom of plastic container.

Step 13: Set All Material

Fit all material as per picture.

Step 14: Make Recipe

Take 2 Liter milk and sugar mixture and close lid of aluminium container.
Add ice cube and salt at side of aluminium container.

Step 15: Start

Close plastic container lid and connect drill machine to nut.
Start Drill machine at middle speed.

Step 16: 20 Minutes Later

On this drill machine for 20 minutes.

Step 17: Ice Cream Ready

Then off drill machine and take ice cream in glass.